
Here’s how you can create wall art mockups and video mockups on Canva and Photoshop ( detailed step-by-step guide )

Want to grab your customers’ attention as an Etsy seller for wall design products? Simply showing your mockups isn’t cut; you need to stand out. But don’t worry, I’ve got you covered! This guide will walk you through how to showcase your wall art mockups.
A wall art mockup shows your artwork’s appearance when hung on a wall. It presents your art realistically, helping potential buyers visualize it in their own space.
Planning your mockups starts with thorough market research. Visit popular Etsy shops like Laya and Lola to understand what makes their presentations successful. Here’s how to develop your mockup strategy:
Study your competition’s presentation style:
Now consider your audience’s preferences:
Finalise your template:
Remember to keep your mockups realistic and professional. You aim to help customers visualize your art in their space while maintaining a high-end appearance.
[ ALSO NOTE: Best 5 Wall Art Mockup Generators You Need For Your POD ]
Canva offers free and premium templates that are eye-catching and easy to use. To create a mockup with Canva, follow these steps:
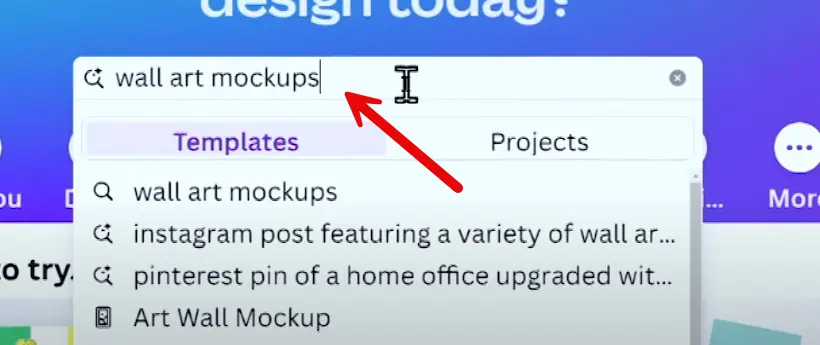
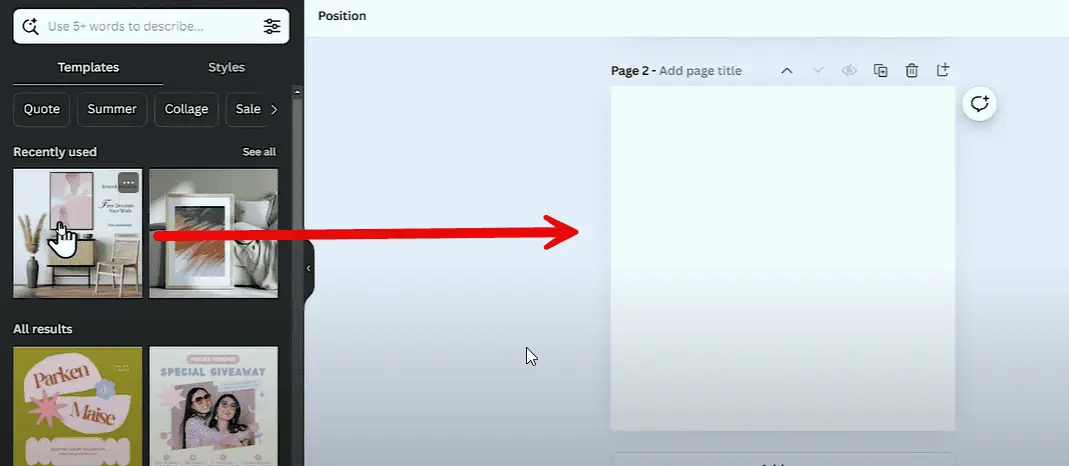
Search for “wall art mockup” or “mockup wall art” on Canva’s template search bar. You can also use specific keywords like “wall art mockup template” or “mockup wall art template” to find relevant results.
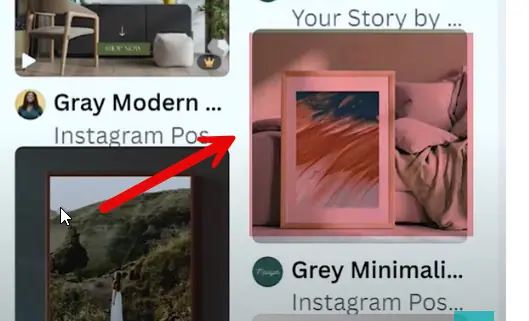
Browse through the search results and choose a template that suits your style and brand. Make sure to check the reviews and ratings of the template to ensure it’s high-quality and easy to use.
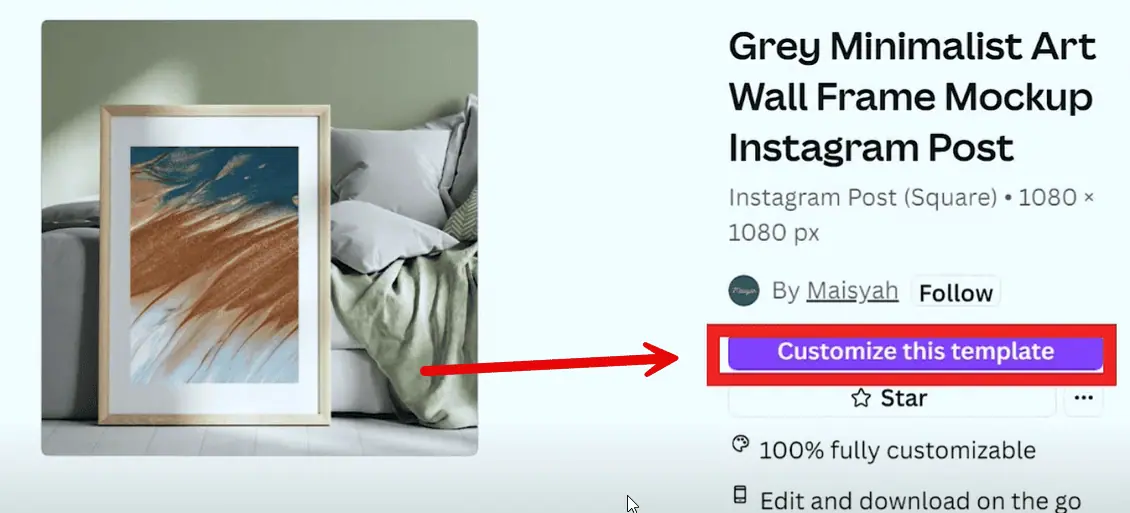
Click on the “Customize this template” button to open the template in Canva’s editor. From here, you can upload your artwork, adjust the layout, and customize the design to fit your needs.
Click the “Upload” button on the left sidebar and select your artwork file.
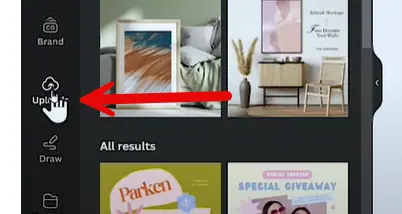
You can also drag and drop your file into the editor.
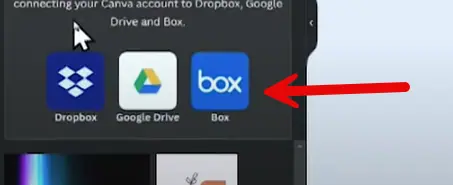
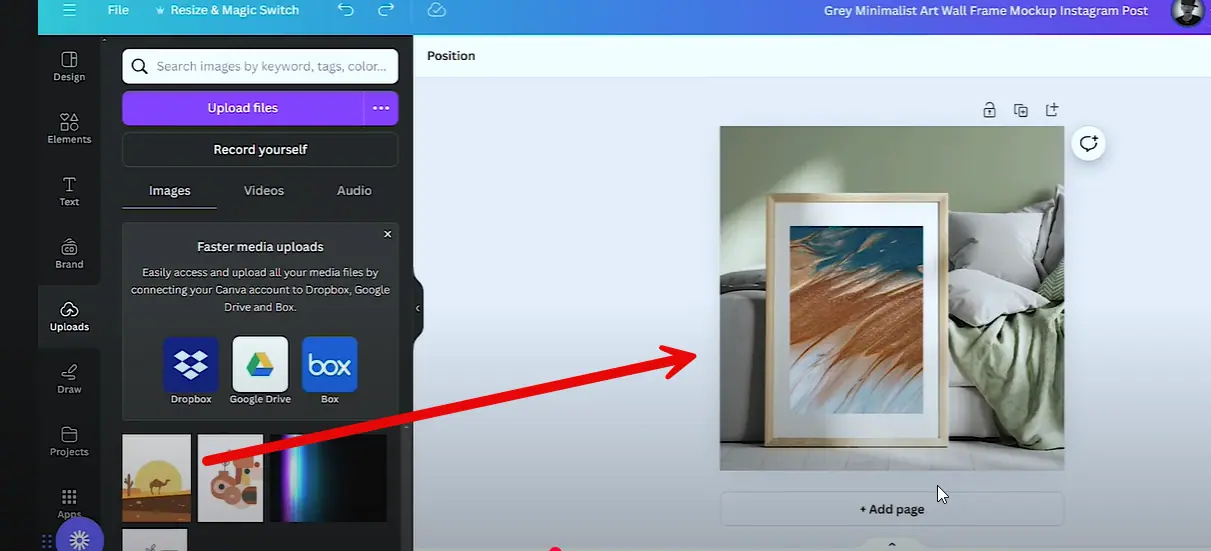
Or, you can drag and drop your art from cloud storage services.
You can also choose a selective file from your computer and add it to the Canva editor.

You can select one or more files at the same time. All of the selected files will appear on the Canva tool.
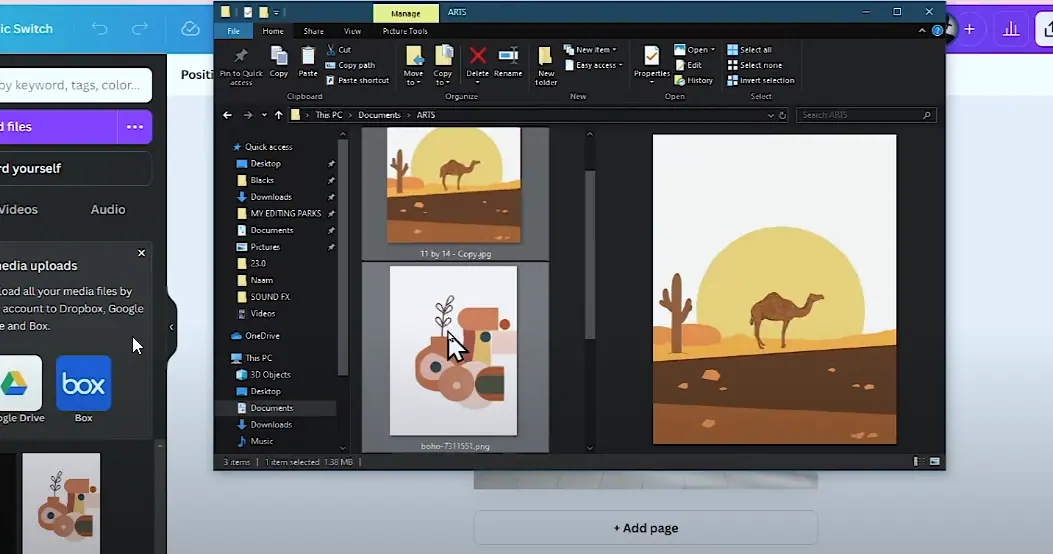
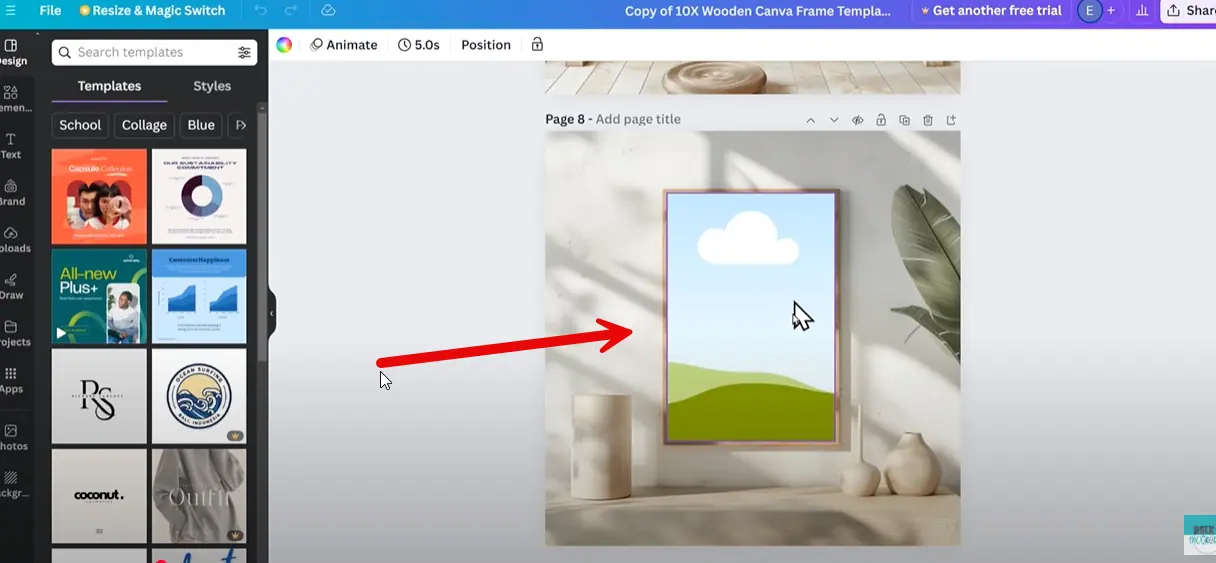
Drag your uploaded art onto the template, and Canva will automatically snap it into place and resize it accordingly.
Once done, Canva automatically adjusts and resizes the image on the template. In some cases, the images may tilt automatically. You will have to adjust the image manually.
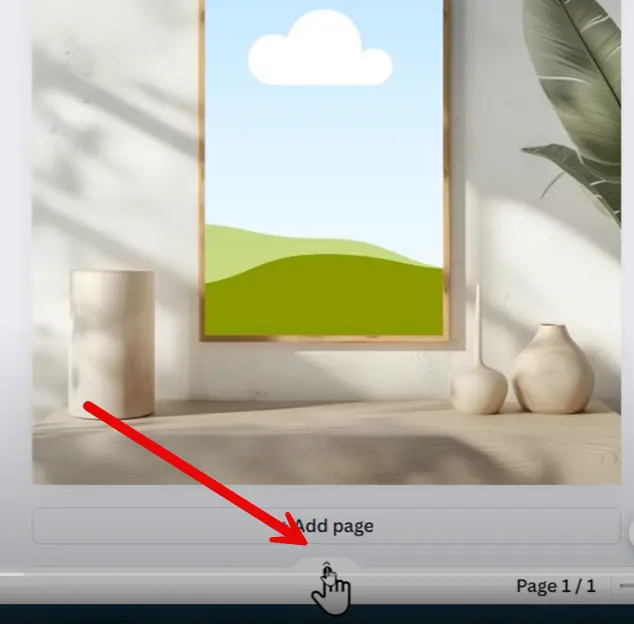
Add new pages for different perspectives of your artwork. Search for another wall art mockup template in the same way. Choose a suitable template and drop it on the Canva Workspace.
You can then choose your wall art and drop it on this template and follow the same process. This way, you can create at least four different angles, including a lifestyle view, a gallery view, and an information page with product details. Yes, it’s that simple.
Your store looks more professional if your wall art mockups are in video versions. You can use Canva to do the same.
Acquire a quality mockup template from any preferred source.
Open it in Canva and select your preferred design, and delete any unnecessary elements to create a clean workspace.
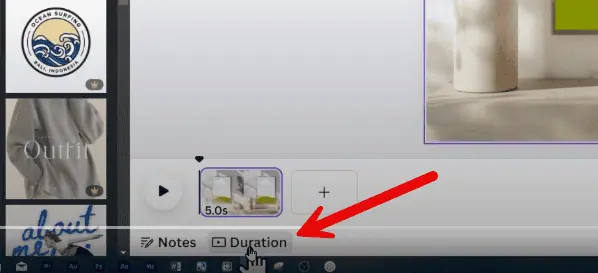
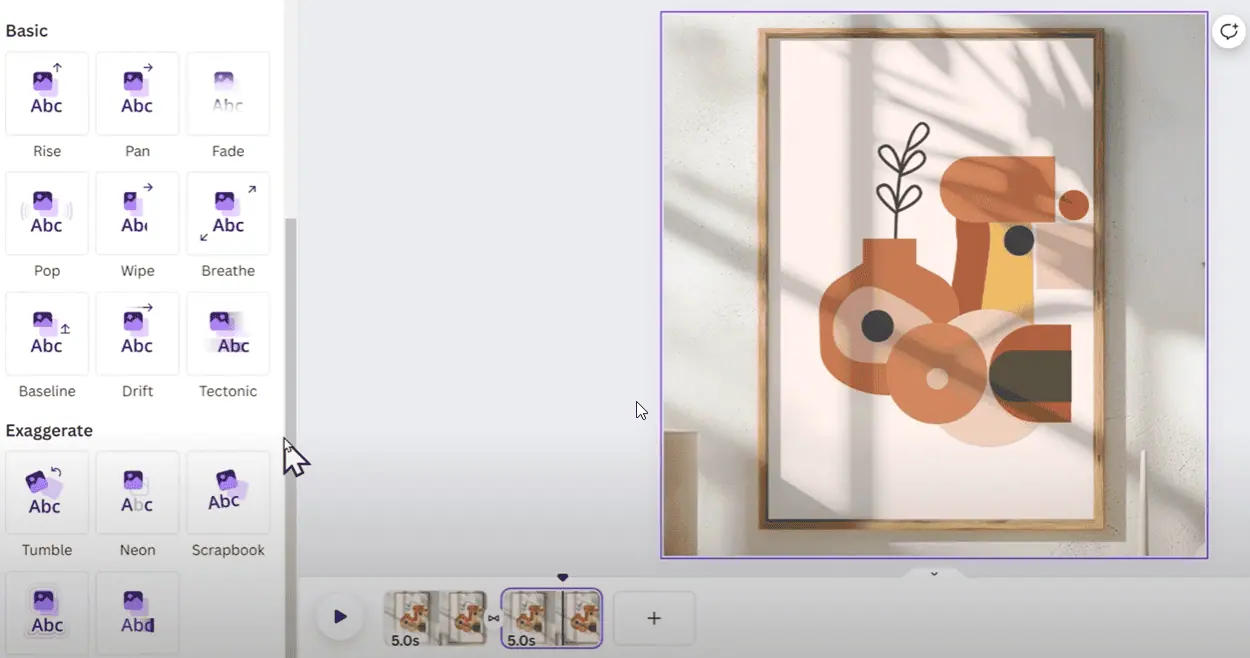
Click the small arrow below your template to enter the video mode.
Go to the “duration” option to transform your template into a video-ready slide format.
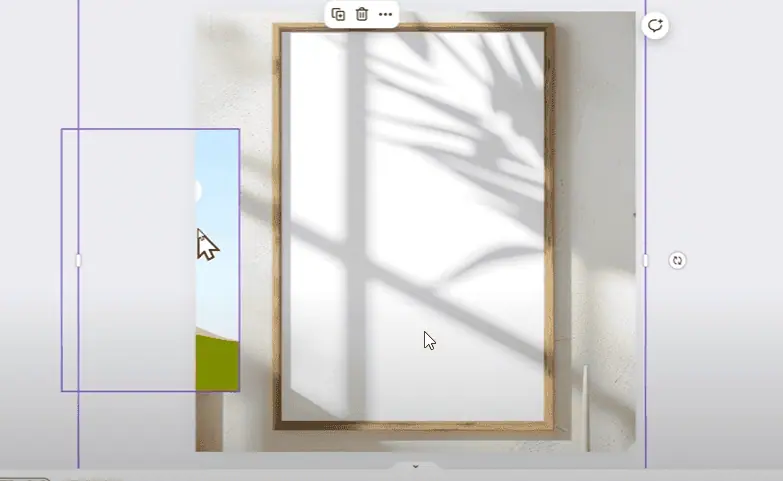
Unlock the template elements by clicking on them and selecting the lock icon above to gain full customization control over your design.

Unlock both shadows and background components, scale up the background to fit the frame properly, and reposition any displaced layers back to their original positions.
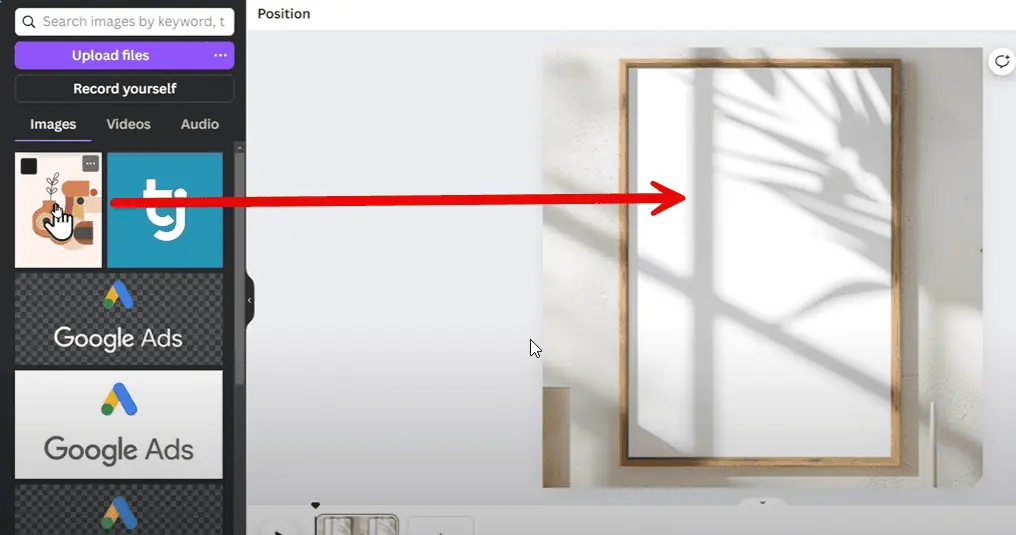
Delete the existing placeholder, upload your art piece, drag it into the frame.
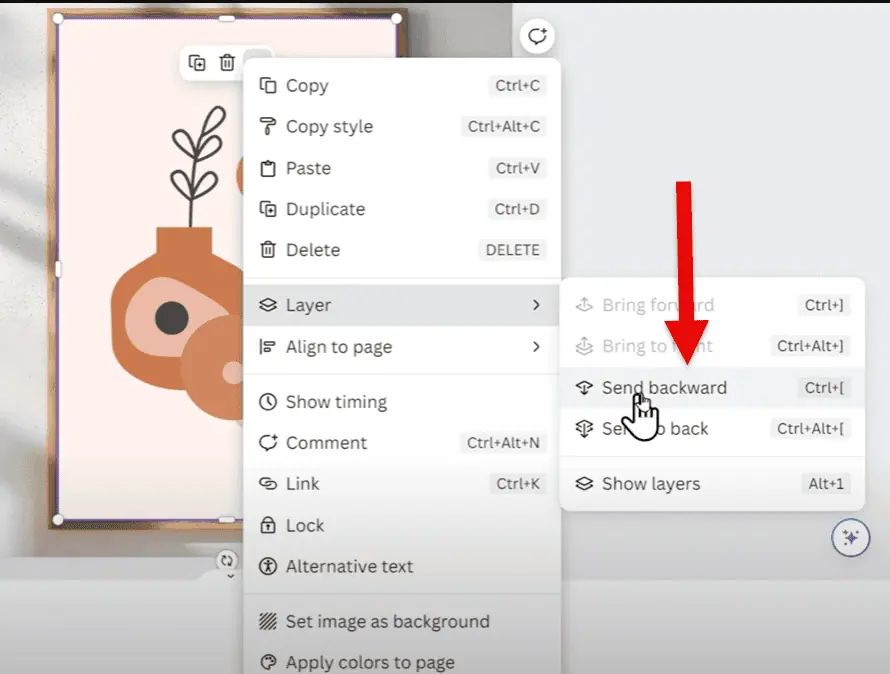
Then right-click to select “layer” and “send backwards” for proper positioning.
Use Control + A (Command + A for Mac) to select all layers and click the group option above to combine everything into a unified design.
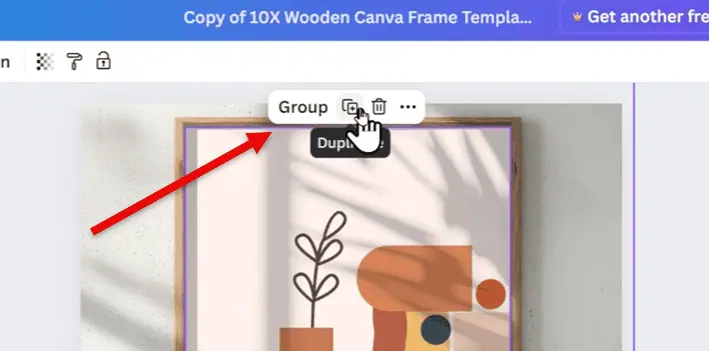
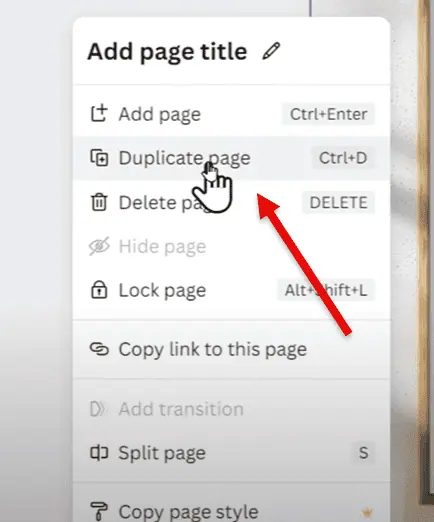
Right-click on the slide’s icon on the video effect bar and click on ‘Duplicate’ to create a copy of your first slide.
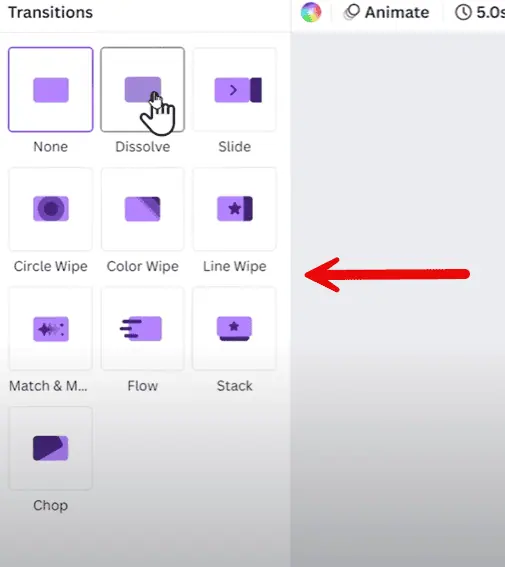
Position your cursor between slides to access the transition icon, select “dissolve,” and set a 1-second duration for a smooth fade effect.
Add the “breathe” animation to the first slide for a zoom-out effect.
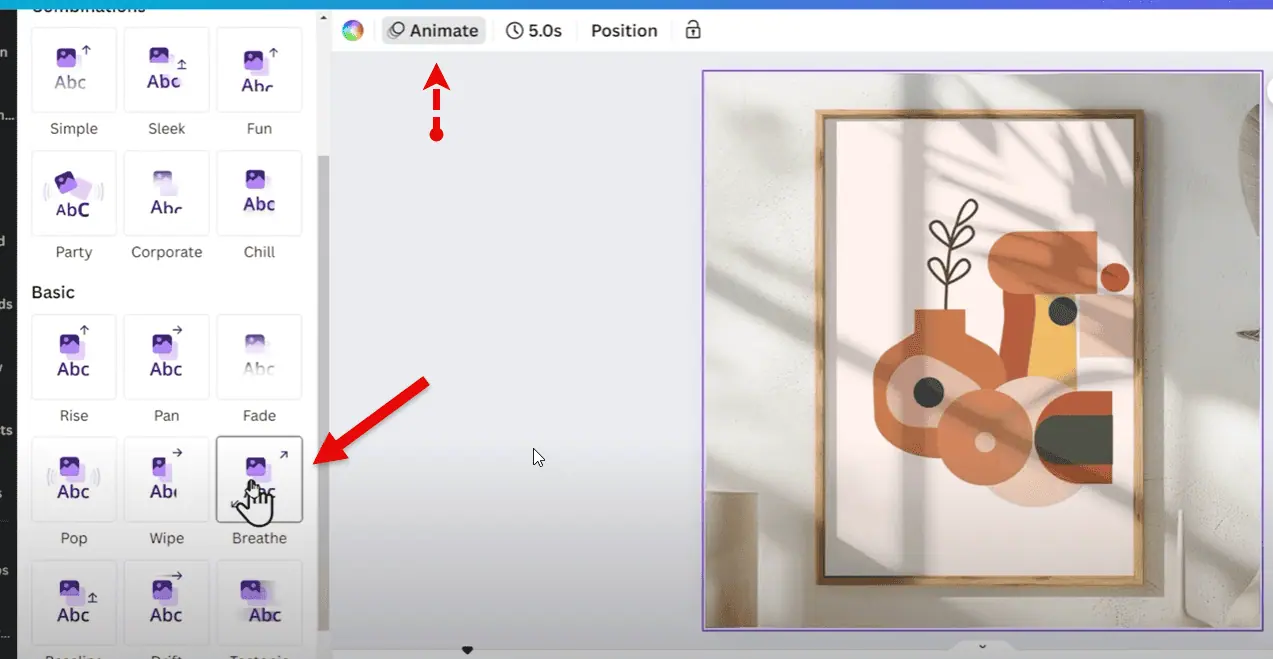
Then, add the “tectonic” animation to the second slide for a left-to-right pan.
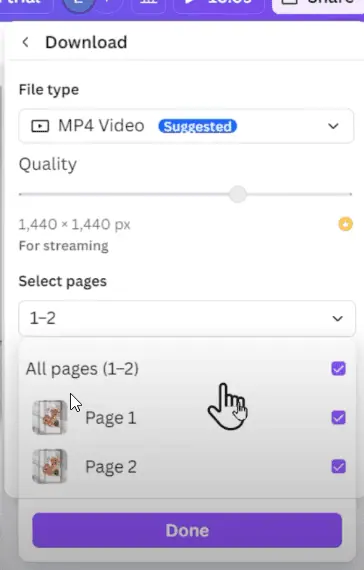
Click Share and select Download.

Choose MP4 format with all pages included, and download your completed video mockup.
Your video wall art mockup video is ready to be uploaded to your Etsy store. Let’s move on and learn how to make mockups with Photoshop.
Photoshop offers detailed and realistic mockups that include shadows, highlights, and glare. To create a mockup with Photoshop, follow these steps:
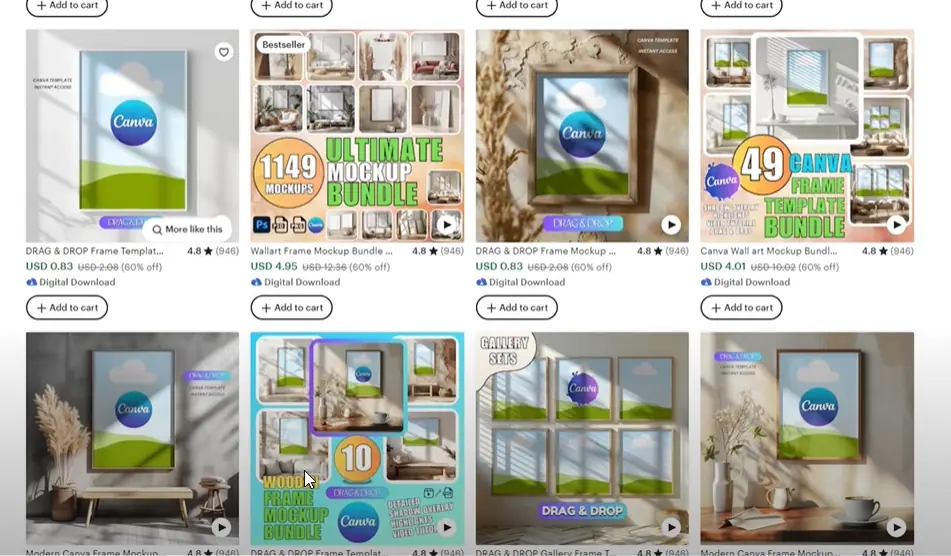
You can download readymade professional Photoshop templates from sites like Creative Market or Etsy. Make sure to choose a template with good reviews and ratings.
Launch Adobe Photoshop and open the downloaded templates.
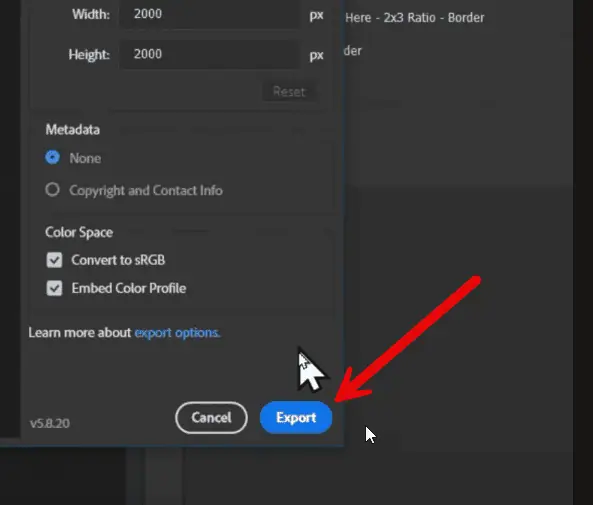
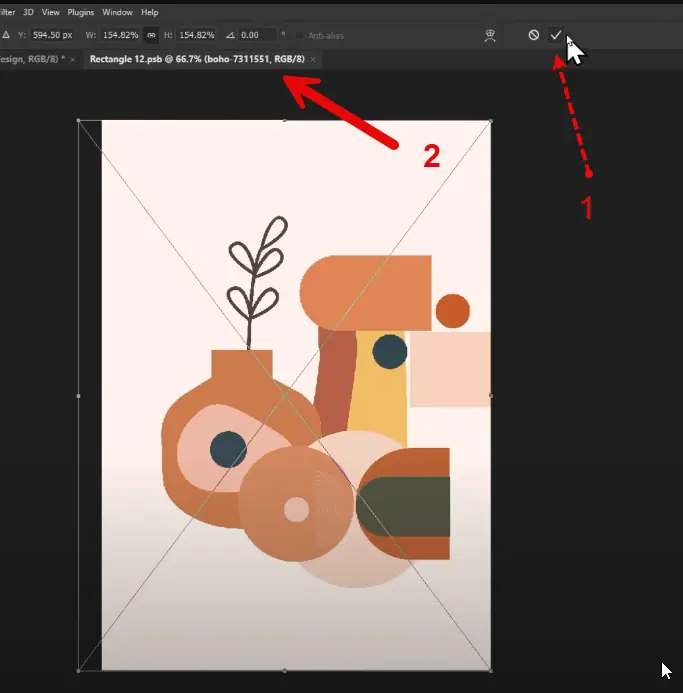
Set the aspect ratio to 1:1 by clicking “Image” and then “Image Size.” Select ‘Pixels’ and set the aspect ratio as 2000:2000. This will ensure that your mockup is square and looks professional.
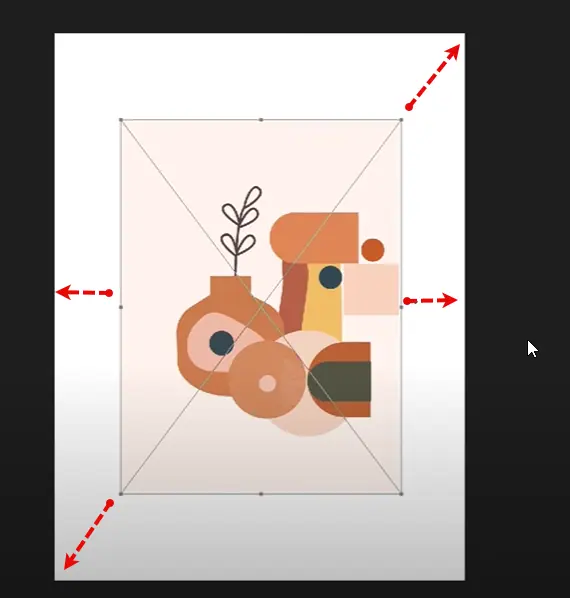
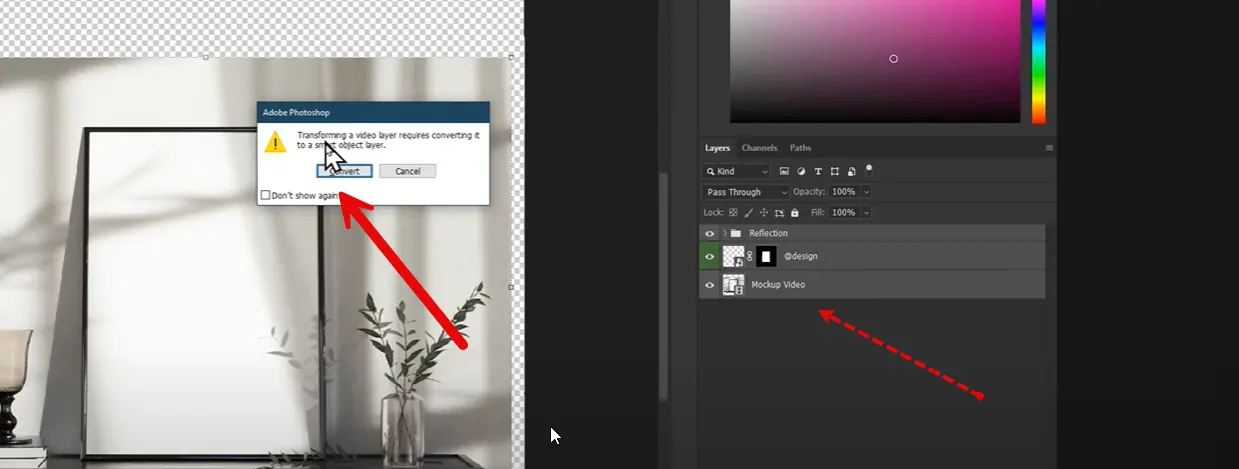
Select all the layers and click on “CTRL or CMD + T” to transform it. Resize and place it accordingly.
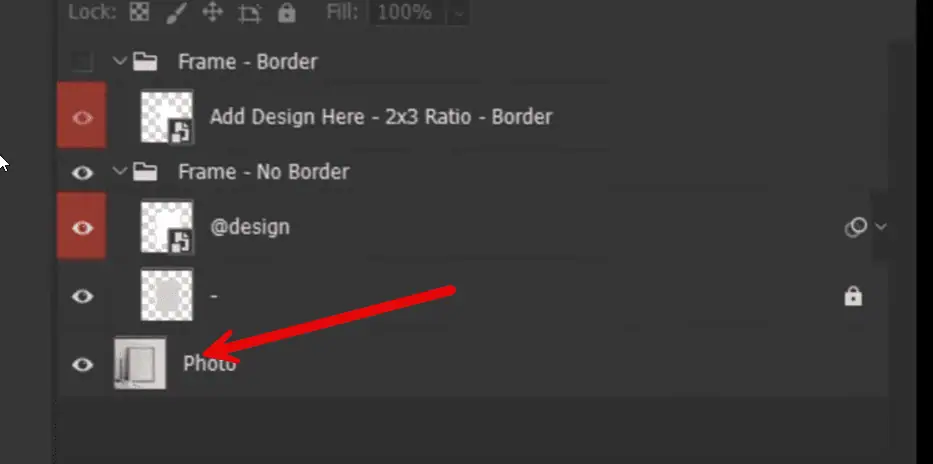
Find the smart object layer labeled “Your Design” and double-click on it to open it in a new tab.
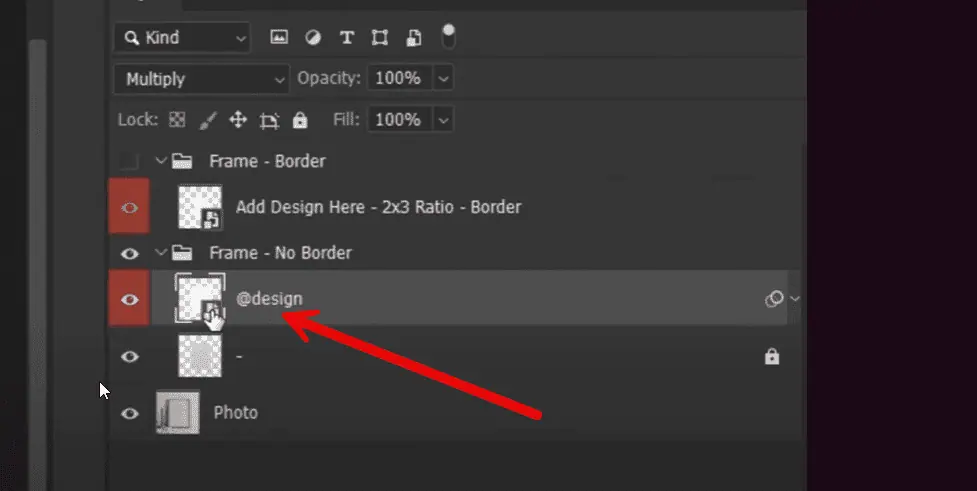
Drag your artwork and drop it on the smart object layer. Resize it and position it to fit within the smart object.
Save and close the smart object tab. Your design will now be integrated into the main mockup template. Your saved wall art will look like this on the template.
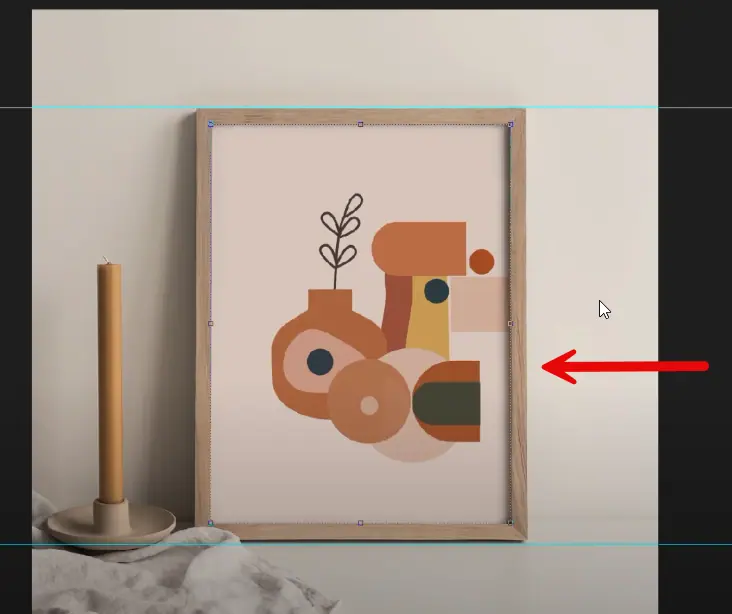
Follow the same process for other templates you have added to Photoshop earlier.
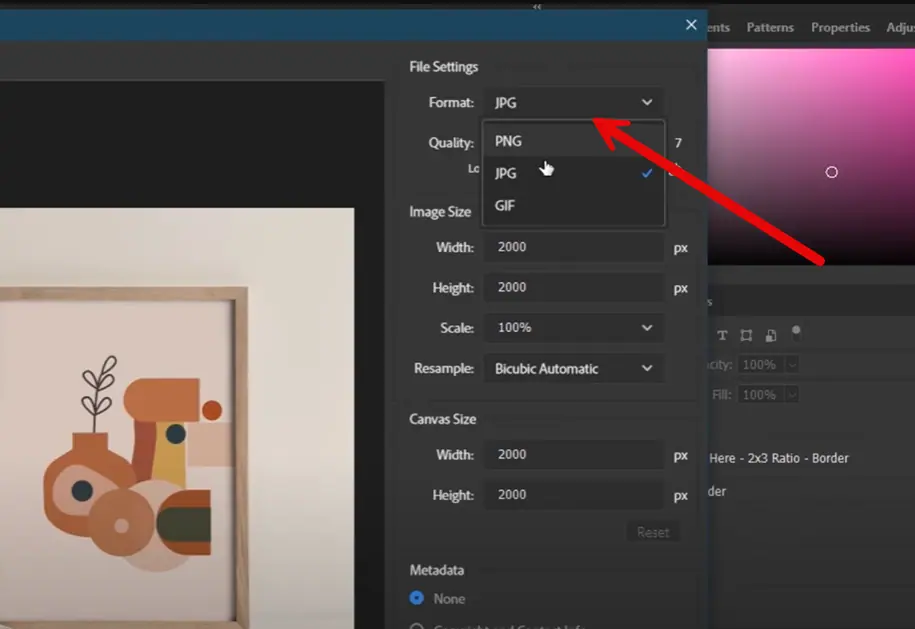
Save your wall art template file by clicking on ‘Export’. This is how simple it can be to create wall art mockups for your Etsy store. Let’s learn how to make video mockups in Photoshop for your wall art.
[ ALSO NOTE: Canvas Wall Art Mockup | Bulk Product Mockup Generator ]
To create a video mockup with Photoshop, follow these steps:
Download a video mockup template from sites like Creative Market or Etsy. Make sure to choose a template with good reviews and ratings.

Select and open the template in Photoshop.
Set the aspect ratio to 1:1 by clicking on “Image” and then “Canvas Size.”
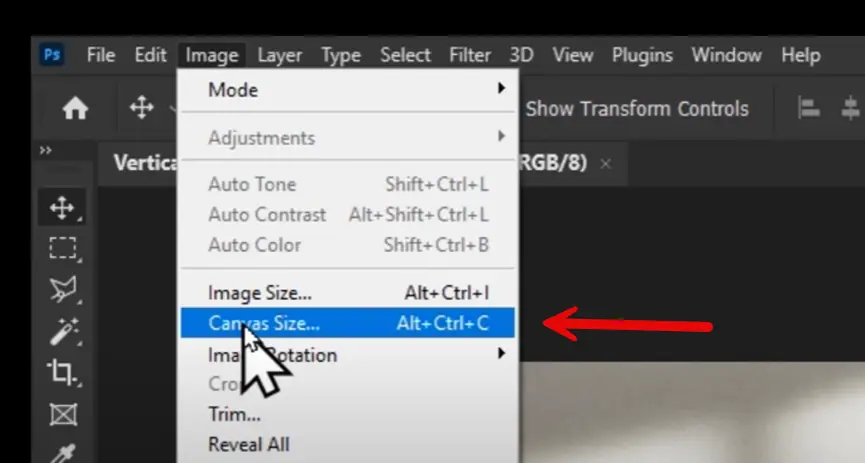
Now, set the pixel ratio to 2000:2000 and prepare the template. This will ensure that your mockup is square and looks professional.
Select all the layers and click on “CTRL or CMD + T” to transform it. Resize and place it accordingly.
Find the smart object layer labeled “Design” and double-click on it to open it in a new tab.

Drag your artwork to the smart object layer, resize it, and position it to fit within the smart object.
Save and close the smart object tab. Your design will now be integrated into the main mockup template.
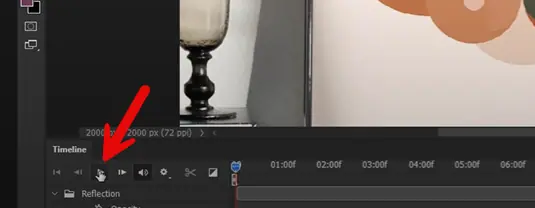
Preview the animation by going to “Window” and then “Timeline.” Click the play button to preview the animation.
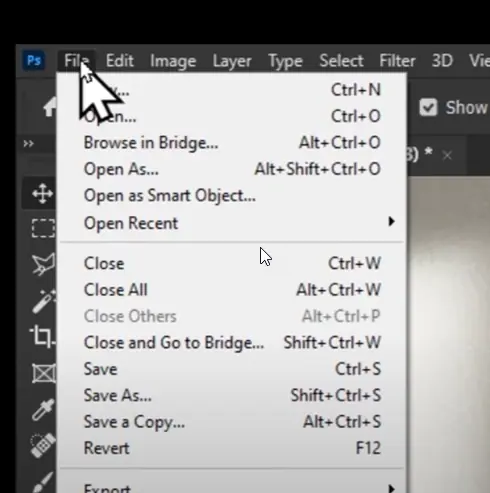
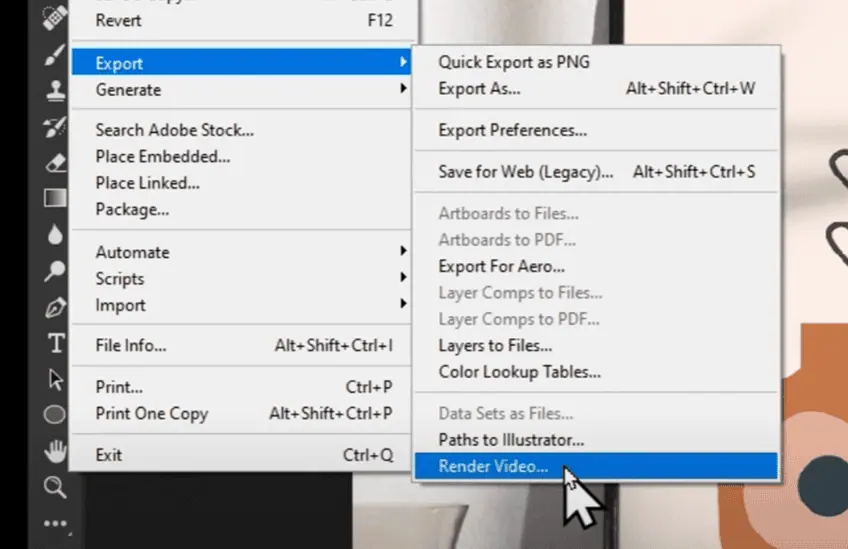
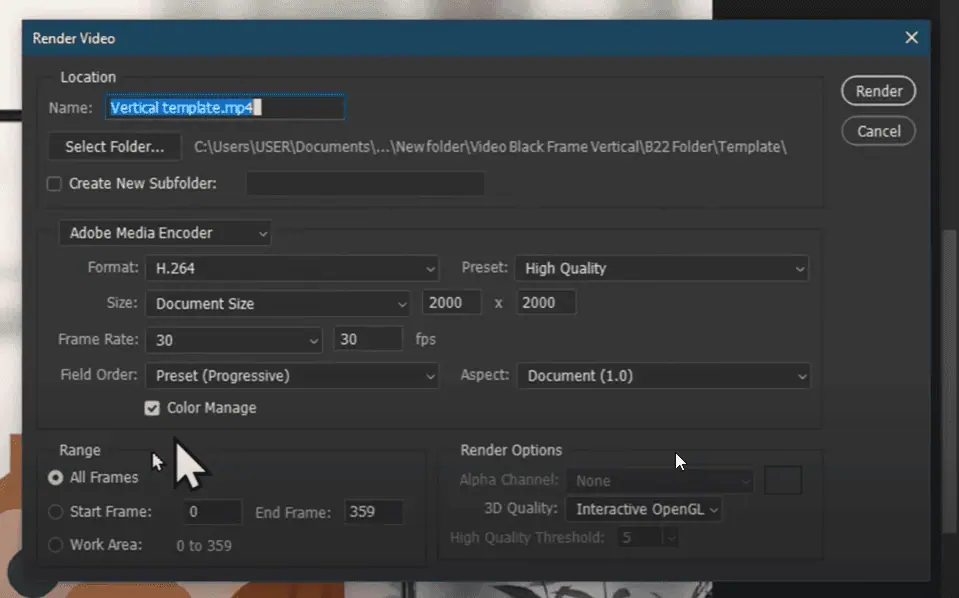
Export the video mockup by going to “File,” and then “Export.”
Click on “Render Video.” Choose the desired settings for format, quality, and resolution.
A final menu window will appear. You can set the desired features of this video mockup accordingly and export the file.
That’s how a video mockup is done. It is time-consuming when you have to do multiple mockups. Here, you can use Bulk Mockup Plugin, a unique wall art mockup generator, to automate the process. Let’s show you how.
Creating mockups for multiple listings can be time-consuming and tedious. The Bulk Mockup plugin can help automate this process, saving you hours of work. To use the plugin, follow these steps:
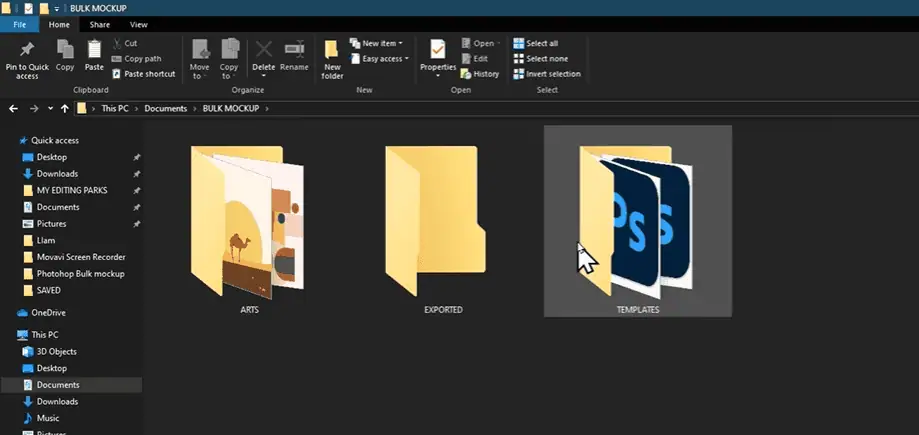
Create three separate folders: one for the templates, one for the artwork, and one for the exported files.
Jump into Photoshop and start the Bulk Mockup plugin.

Click on the “PSD Template Folder” button and choose your template.
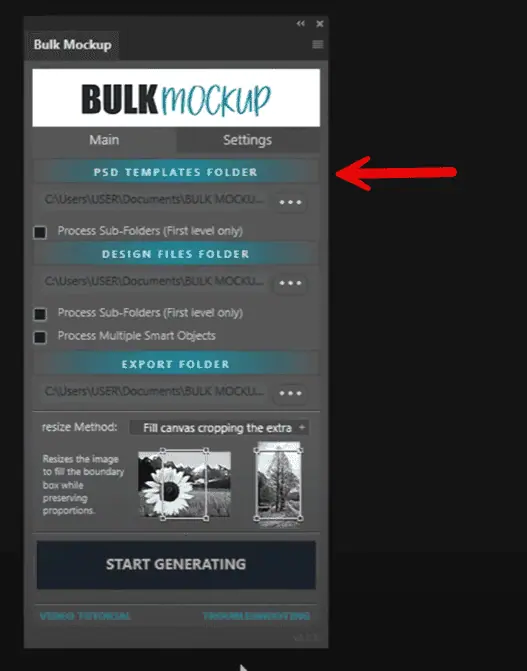
Click on the “Design File Folder” button and choose the folder containing your artwork.
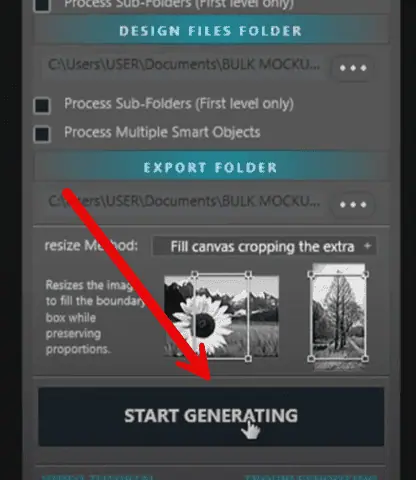
Click on the “Export Folder” button and select your export folder.
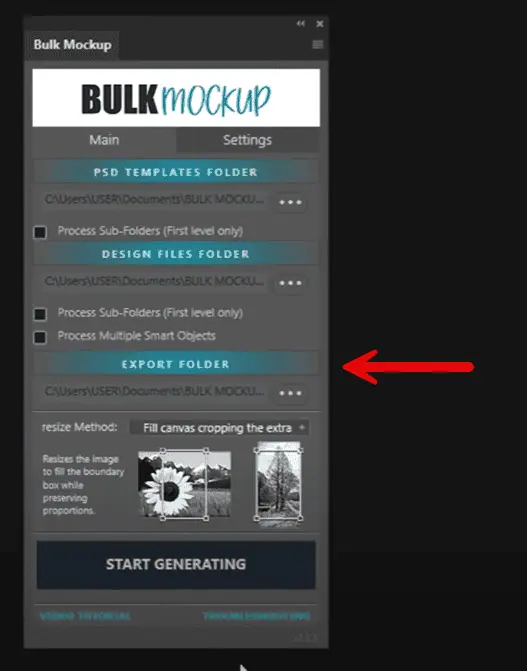
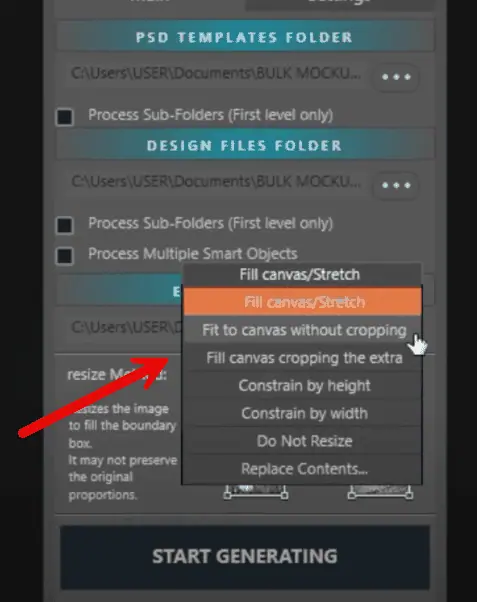
Choose the option in the wall art mockup generator that works best for you if your art’s aspect ratio differs from that of the frame mockups in your templates.
Hit “Start Generating,” and the magic will start. The plugin will create multiple mockups automatically, saving you hours of work.
By following these steps and using the right tools, you can create stunning wall art mockups and video mockups for your Etsy store. Increase your sales by making your shop look more professional.
Remember to regularly update your mockups and test different styles to find what works best for your audience. For new ideas, you can also use midjourney to create wall art mockups with prompts.
The cropping effect on Etsy refers to how listing images are automatically cropped to fit specific aspect ratios in thumbnail views. Etsy requires images for listings to have a minimum size of 2000 pixels wide by 2000 pixels tall, with a 1:1 aspect ratio for optimal presentation. Clear, centered images are recommended to maximize visibility. To optimize your mockups better:
For best results, design your primary image in a square format, placing the most important elements in the center 80% of the frame. This ensures your artwork remains visible in the mockup wall art regardless of how Etsy crops and displays it across different pages and devices.
Center your artwork within a square format and leave adequate margins around important elements to prevent cropping issues. Keep your main design elements within the center 80% of the frame to ensure visibility across all Etsy display formats.
Minimalist room settings with neutral colors and modern furniture dominate the wall art mockup scene. Video mockups that show subtle movements and multiple angles of the artwork are also gaining significant traction.
Canva is perfect for beginners, offering free templates and an intuitive interface. Photoshop provides more advanced features for creating realistic shadows and lighting effects. For bulk creation, Photoshop with the Bulk Mockup plugin is the most efficient option.
The main types include lifestyle mockups (showing art in room settings), close-up mockups (displaying detail and texture), and gallery-style mockups (showing multiple pieces together). Video mockups are becoming increasingly popular as they provide a more dynamic and engaging presentation of the artwork.
![How to Create T Shirt Video Mockup Templates in Photoshop to Sell on Etsy? [NEW]](https://www.bulkmockup.com/wp-content/uploads/2025/02/Qikink-Mockup-Generator-768x402.webp)

