Learn how to make professional product mockups with simple base images in Photoshop. Use this skill to upscale your POD business.


Want to make clean, client-ready product mockups in Photoshop without spending hours dragging and warping layers?
In this guide, I’ll walk you through two paths:
Whether you’re mocking up t-shirts, mugs, or UIs, this guide has you covered.
Mockups are used to:
Now, let’s dive into the step-by-step process of creating your mockups in the Photoshop mockup tool. I will use different base images of POD items like mugs, electronic devices, and t-shirts to explain the important aspects of this process elaborately.
The foundation of any mockup is a high-quality base image. There are three main approaches to obtaining base images:
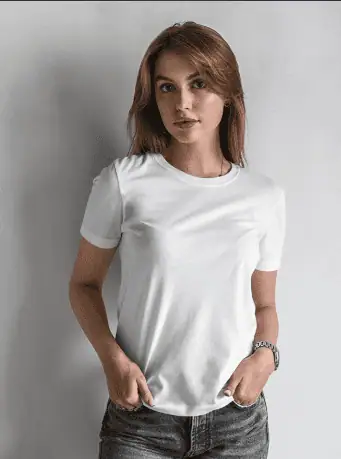
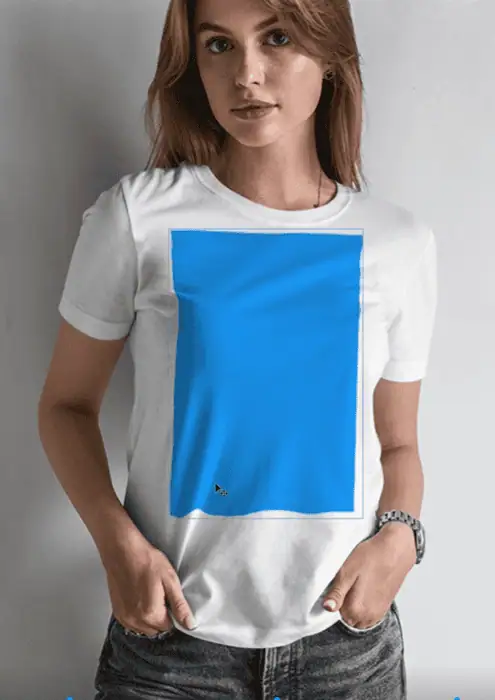
Photo shoot: Take your photos of the products in a controlled environment. For instance, if you want t-shirt mockups, consider using white t-shirts. These images are easy to edit in Photoshop.

For best results, choose images with:
Remember, finding the right base image is the foundation of learning how to make t-shirt mockup in Photoshop. Here is another example of a good mockup base image.

Pro Tip: When you automate with Bulk Mockup, make sure your PSD templates are clean, layered, and high-res. That’s what ensures your exports look perfect at scale.
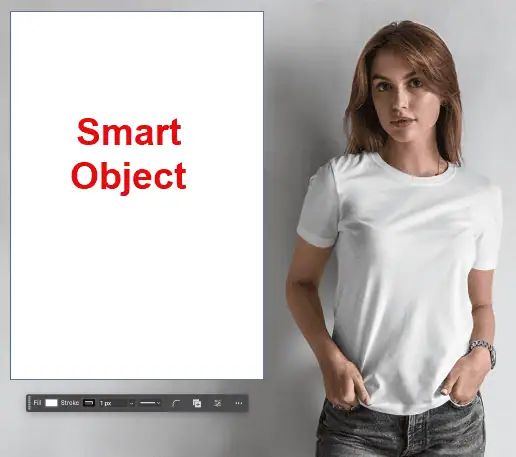
Smart Objects in Photoshop allow you to create dynamic, editable placeholders for your designs. Here is what you should do. Here, we have taken a t-shirt base image to explain this step.
Open your base image in Photoshop.
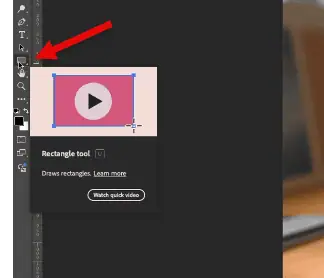
Select the Rectangle Tool from the toolbar on the left side of your Photoshop window.
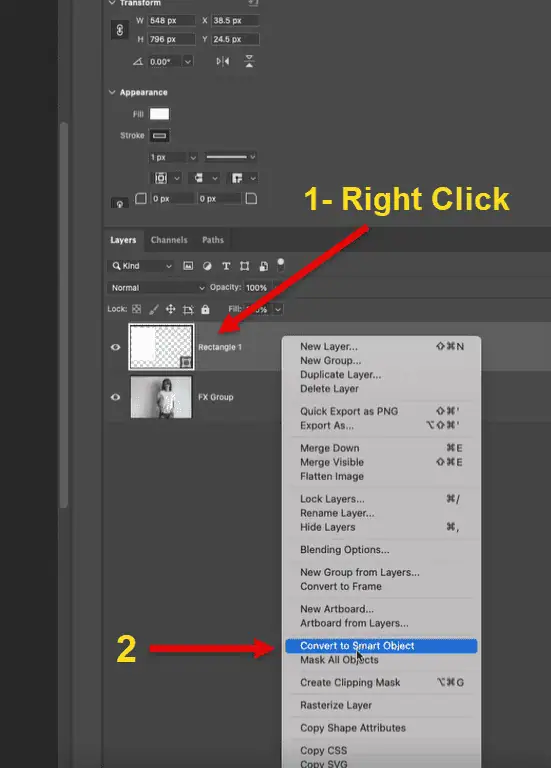
Draw a rectangle over the area where your design will be placed. Remember, always create a bigger smart object to keep your designs in high definition mode. You can always reduce the smart object size.
Set the dimensions based on the physical dimensions of the design area. Right-click on the rectangle layer and select “Convert to Smart Object”.
For products with wrapped designs (like mugs), create your Smart Object in the dimensions of the entire printable area, not just what’s visible from the front. To understand this concept, check out my YouTube tutorial.
Different surfaces require different approaches to positioning:
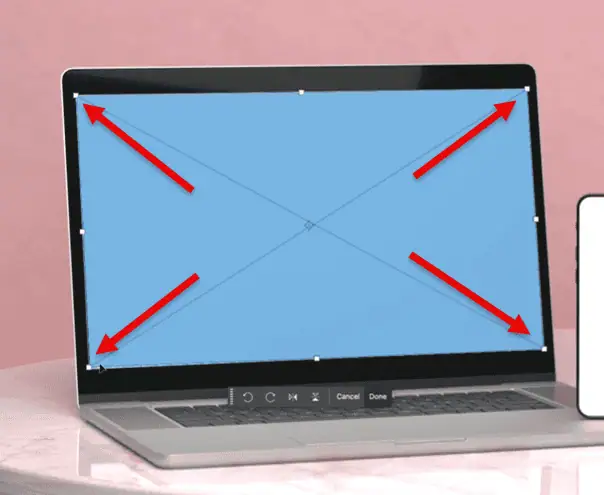
Select the Smart Object layer. Press Ctrl + T (Command + T on Mac) to activate Free Transform.
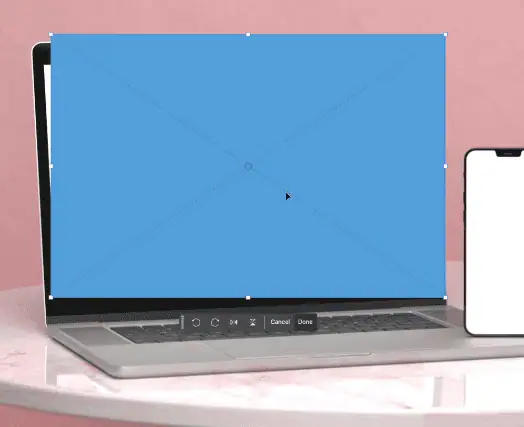
Position the Smart Object over the design area. Positioning a smart object on flat surfaces and curved surfaces is different. Here is what you need to do.
Right-click during transformation and select “Distort” or “Perspective”.
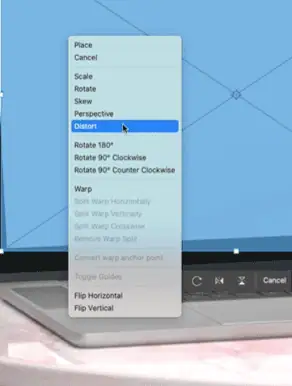
Adjust the anchor points to match the flat surface’s angle and position the smart object.
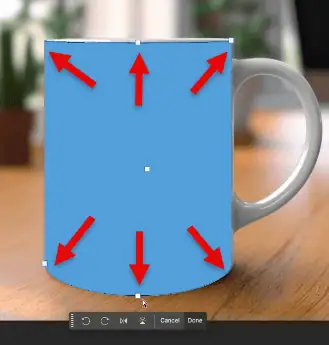
Select and right-click on the smart object during transformation. Next, select “Warp”.

It will appear like this. You can manually adjust the warped layer on the base image.
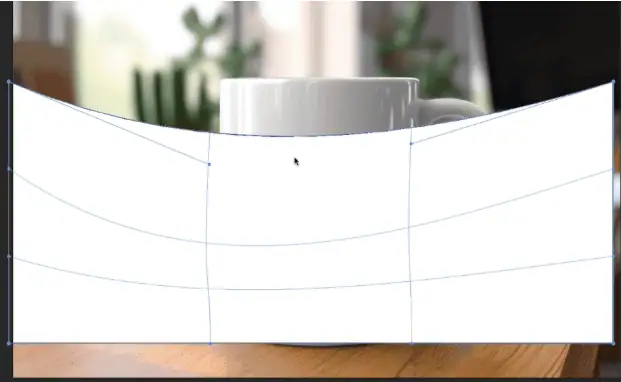
Select the appropriate preset (like “Cylinder” for mugs) or manually adjust the grid points to match the curve of the product. You can find this option at the top middle feature bar in Photoshop.

Once selected, it will appear like this.
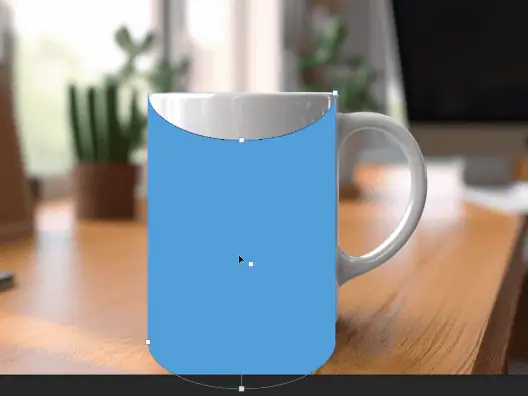
Manually adjust the cylindrical warped layer on the mug surface.
The next step is crucial. We will learn how to add realism.
Warping takes time especially for mugs or curved products. If you’re working with 50+ designs, it’s worth automating this step.
Bulk Mockup supports pre-warped PSDs and handles smart object replacement for you. Build once, reuse infinitely.
Learning how to create realistic mockups in Photoshop is crucial, and this step explains it. Make your design blend naturally with the base image.
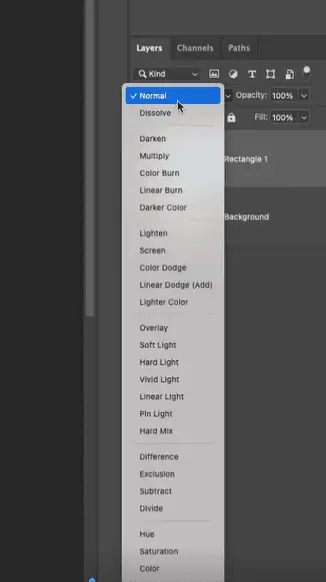
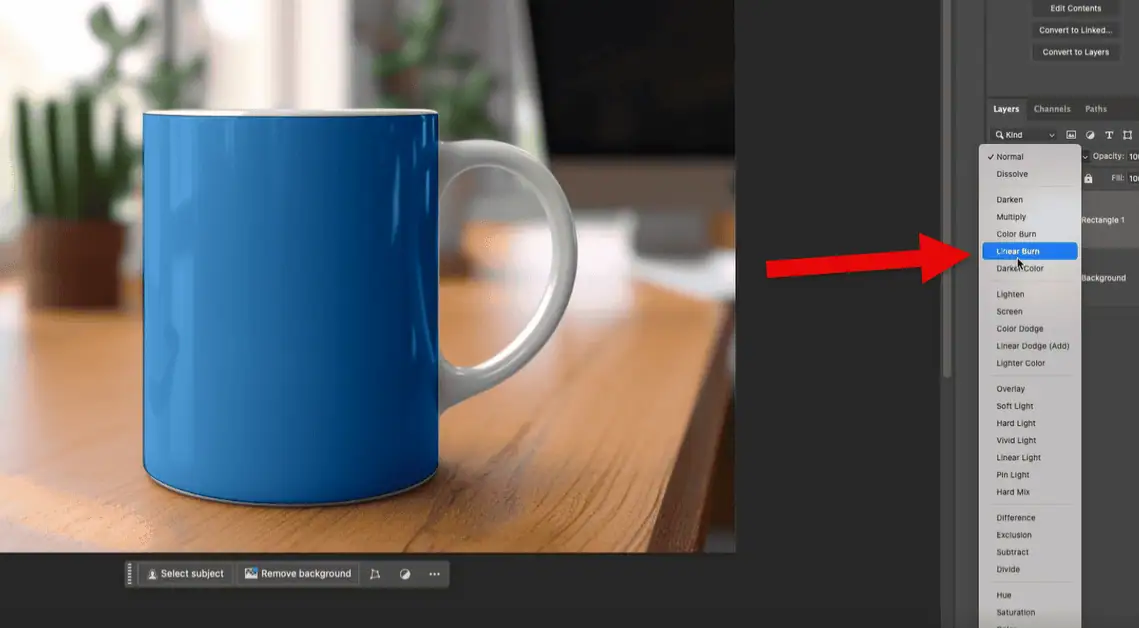
Select the Smart Object layer. Experiment with different blending modes in the Layers panel.
For light-colored products: Try “Multiply” or “Linear Burn”. Check how the smart object looks when Linear Burn is chosen. It preserves the shadows and reflections well.
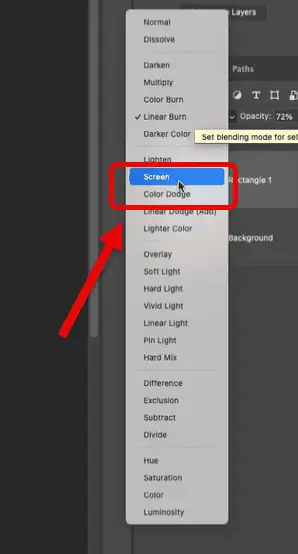
For dark-colored products: Try “Screen” or “Linear Dodge”.
Adjust the opacity if necessary to make the design look natural. Blending modes work particularly well for ceramic surfaces and other materials with visible shadows and highlights.
This process is easy for smooth (flat or curved) surfaces. Products like t-shirts, on the other hand, have folds and contours. Your designs must align well with such surfaces to look realistic.
Here is what you should do.
For textured surfaces like fabric, create a displacement map to make your design follow the contours and curvatures to add realism.
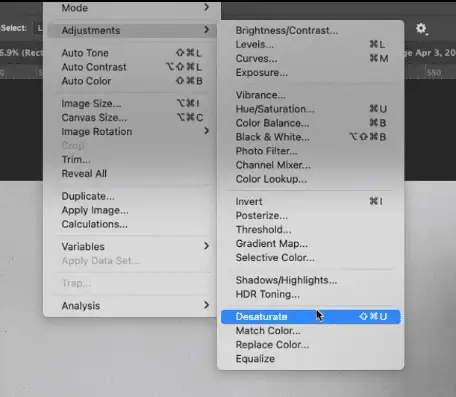
First, duplicate your base image into a new file. Go to Image > Adjustments > Desaturate.
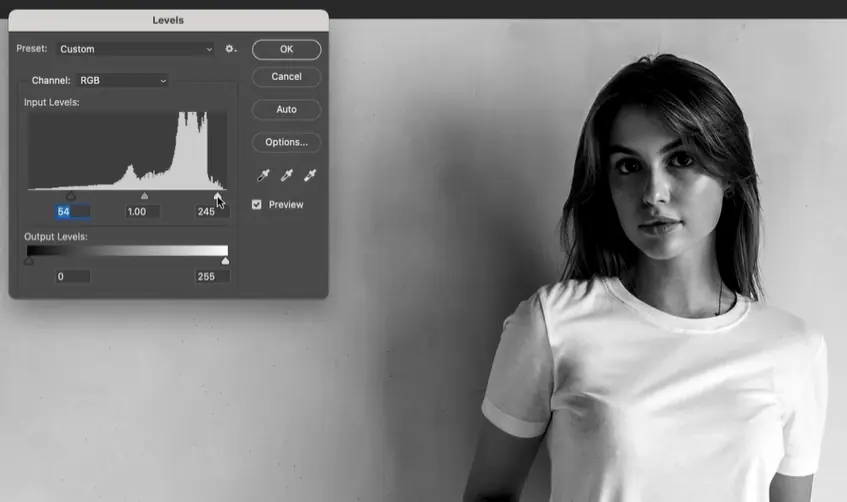
Press Ctrl + L (Command + L on Mac) to adjust levels and increase contrast.
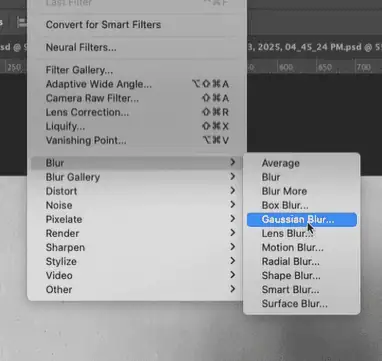
Go to Filter > Blur > Gaussian Blur (Set Radius at around 4-5 pixels).
Save this file as a PSD. Remember, your displacement map should be the same size as the base image.
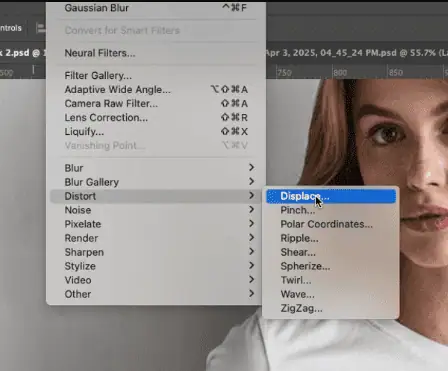
Return to your original file, select the Smart Object layer. Go to Filter > Distort > Displace.
Set horizontal and vertical scale (10-10 works for most cases).

Select your saved displacement map file.

Once the displacement file has been added, the design will now follow the folds and texture of the surface for added realism.
This is how you can make a smart object layer follow the contours and curvature of an uneven base image.
Displacement maps are great for realism on shirts or fabric — but a nightmare to do manually at scale.
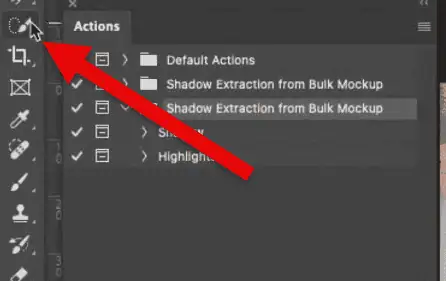
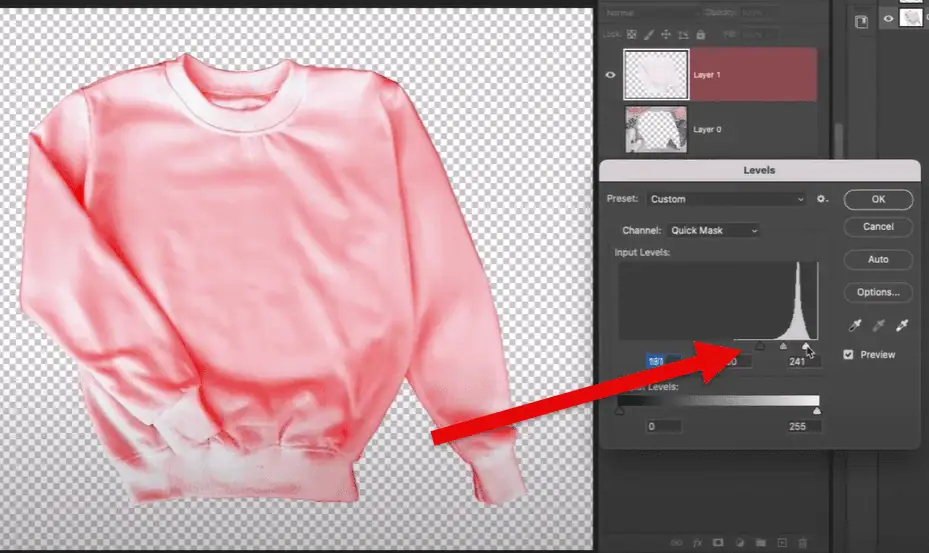
For even more realism, you can extract shadows and highlights from the base image. You can extract shadows with Photoshop Actions.
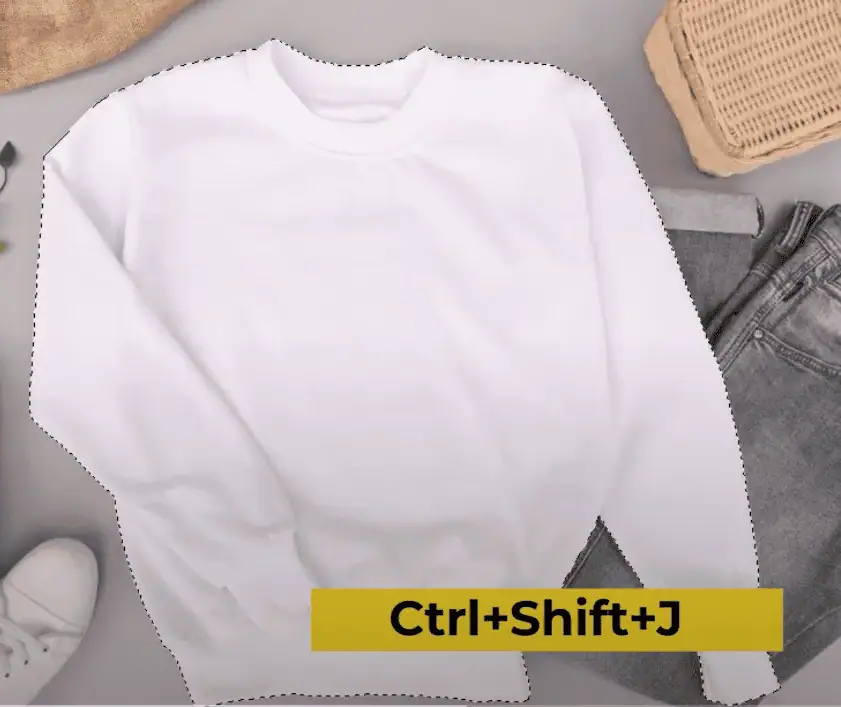
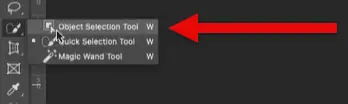
Use the Quick Selection tool to select the object in your image.
Unlock the background layer and press Ctrl + Shift + J to create a new layer from the selection.
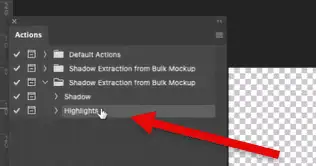
Select the Shadow action and click Play. Adjust level sliders to enhance shadows.
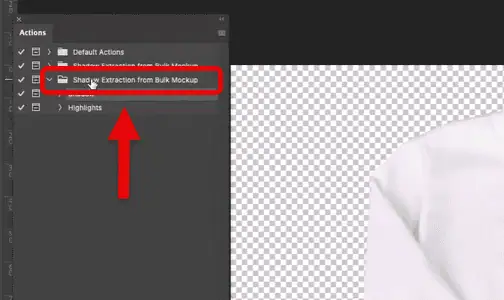
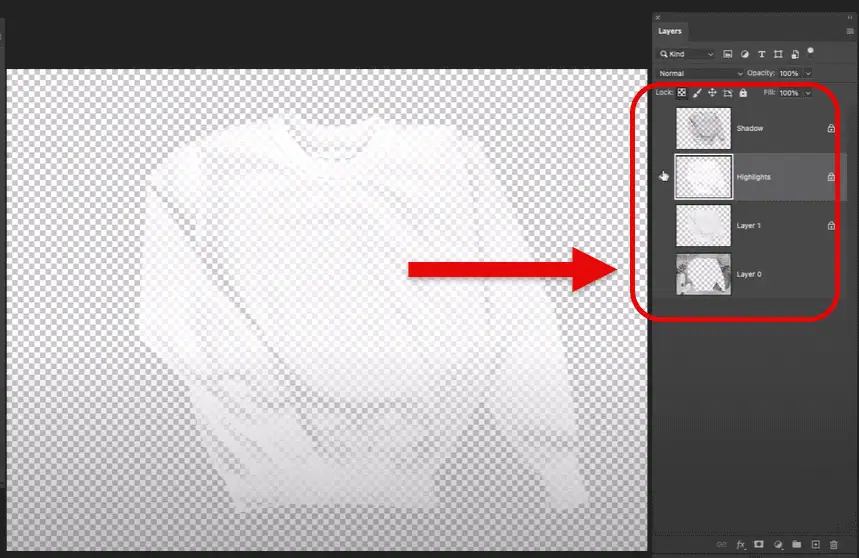
Turn off the Shadow layer, select the main layer, and run the Highlight action. Adjust sliders for best results.
Add a colored layer underneath and turn on both Shadow and Highlight layers.
Adjust opacity as needed. You will find new layers have been created for shadows and highlights.
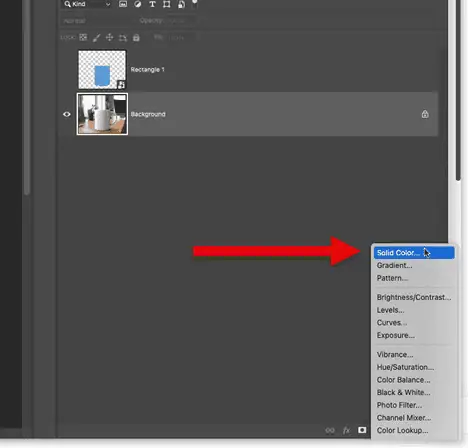
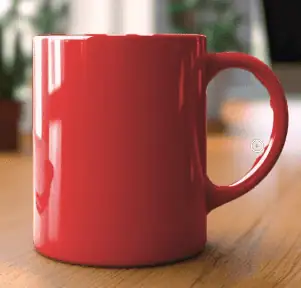
I will explain the color adjustment process with a mug base image.
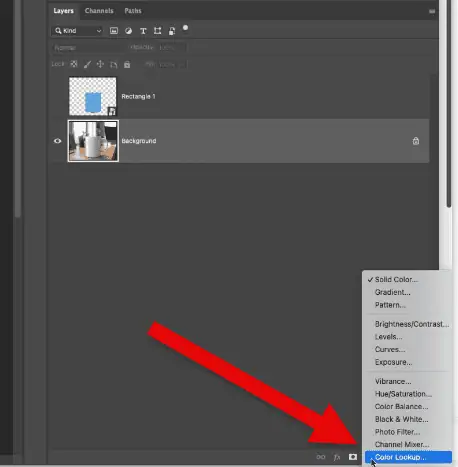
Use the object selection tool to select the mug.
Add a Solid Color adjustment layer above your base image.
Change the blending mode to “Color”.
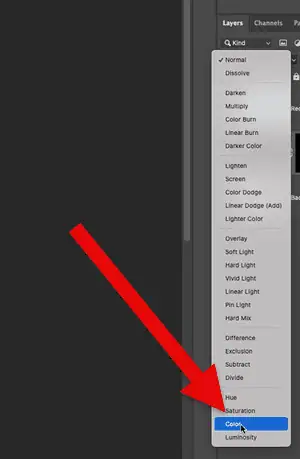
Use opacity to control the intensity. Group this layer with the base image.
You can also add Curves adjustment layers with different blending modes to create various effects and color variations.
The final step explains how to add image to mockup in Photoshop. Ensure your mockup is easily editable.
Right-click on the Smart Object layer and select “Edit Contents”.
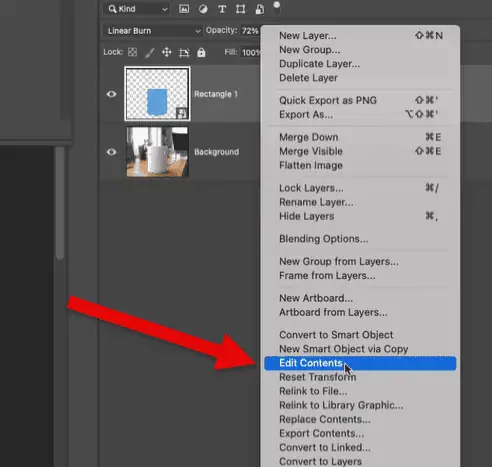
This will open a new document where you can add your design. Place your design and position it as needed.
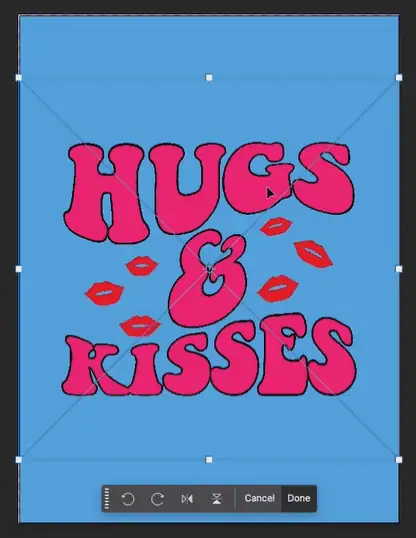
Save and close the Smart Object document. The design will automatically update in your mockup.

This approach allows you to quickly swap designs without recreating the entire mockup each time.
Swapping Smart Object contents is easy… the first time. But doing it hundreds of times?
Bulk Mockup handles that for you. Just point to your folder of designs, and the tool does all the swaps, exports, and renaming automatically.
Save the file as a PSD to preserve all layers for future editing. Export as JPG or PNG for sharing or presentation purposes.
You can create multiple mockups by swapping the designs with the Smart Object of a base image (now PSD mockup template).
What if you can swap multiple designs on a mockup template? Bulk Mockup makes it easier and saves you time.
Manual mockups are fine for one product. But if you’re launching new SKUs weekly, or want to A/B test 20 thumbnails, manual editing kills your time.
Bulk Mockup is a Photoshop plugin built for high-volume sellers. It handles:
You set it up once, and let it rip across hundreds of designs.
Let’s say you’ve got a bunch of designs ready and a few Photoshop mockup templates set up.
Now what?
Doing it all by hand opening each PSD, dropping in a design, resizing it, saving, renaming adds up fast. You waste hours clicking through files when you should be launching products.
That’s where Bulk Mockup saves the day.
It’s a simple Photoshop plugin that batch-creates mockups without you having to touch each file manually.
You just tell it:
The plugin takes it from there automatically.
It:
Need a visual? Watch this quick demo to see it in action.
If you’ve already got PSD templates set up with Smart Objects, Bulk Mockup plugs right into your workflow. Not sure how Smart Objects work? Check out this guide:
👉 How to Make a Mockup with Smart Object
Want to learn how to prepare your files for bulk automation? This will walk you through it:
👉 How to Batch Replace Smart Object Layer in Bulk
And yes it even works with video mockups if your templates are set up right.
So instead of spending all day in Photoshop, you just click once and let it do the heavy lifting.
The key tools are Smart Objects, Transform (especially Warp), Layer Masks, Blending Modes, and Guides—these help place, shape, and blend your design into the base image.
Yes, you can use Photoshop’s Batch Actions or Image Processor scripts along with templates using Smart Objects to automate applying multiple designs.
Sort of. You can use pre-made PSD mockup templates with Smart Objects—just drag and drop your design in. No deep editing skills needed.
Yes, as long as the image is high quality and has a clear surface area, you can manually set it up using Smart Objects and warping tools to turn it into a reusable mockup.
Yes, platforms like Placeit, Mediamodifier, or Canva Pro allow you to upload designs and automatically place them on mockups without needing Photoshop.
Not a specific “mockup tool,” but Photoshop’s Smart Objects, Layer Styles, and Warp Transform effectively serve as the building blocks of custom mockups.
Place your design in a Smart Object layer, then distort or warp it if needed. When you edit that Smart Object later, it auto-updates on the mockup.
You’ll mostly rely on Smart Objects, Transform, Warp, Layer Masks, Opacity Adjustments, and Blending Modes like Multiply or Overlay.
Open your base image, create a Smart Object where your design goes, warp or align it to match the object’s shape, adjust blending and shadows, and save the PSD for future reuse.